


Have you ever had an idea rolling around in your head and
FINALLY you try it and it actually WORKS??!!!
I'd been thinking about making a cardboard template that I could
wrap seam binding around BUT be able to sew it together up the middle
to create my own seam binding fringe.
1. I found some heavy duty cardboard in my box stash and cut a
5 1/2" wide x 12" long rectangle.
Then I cut out about 1 3/4" strip out of the middle but not
all the way on one end. I wanted a very tall "U" shape.
2. Pin the end of the seam binding to the cardboard on one side
and begin wrapping around the cardboard, twisting the seam binding
when you reach each side to go back around. The twist will add a bit
of dimension and fluff to the fringe.

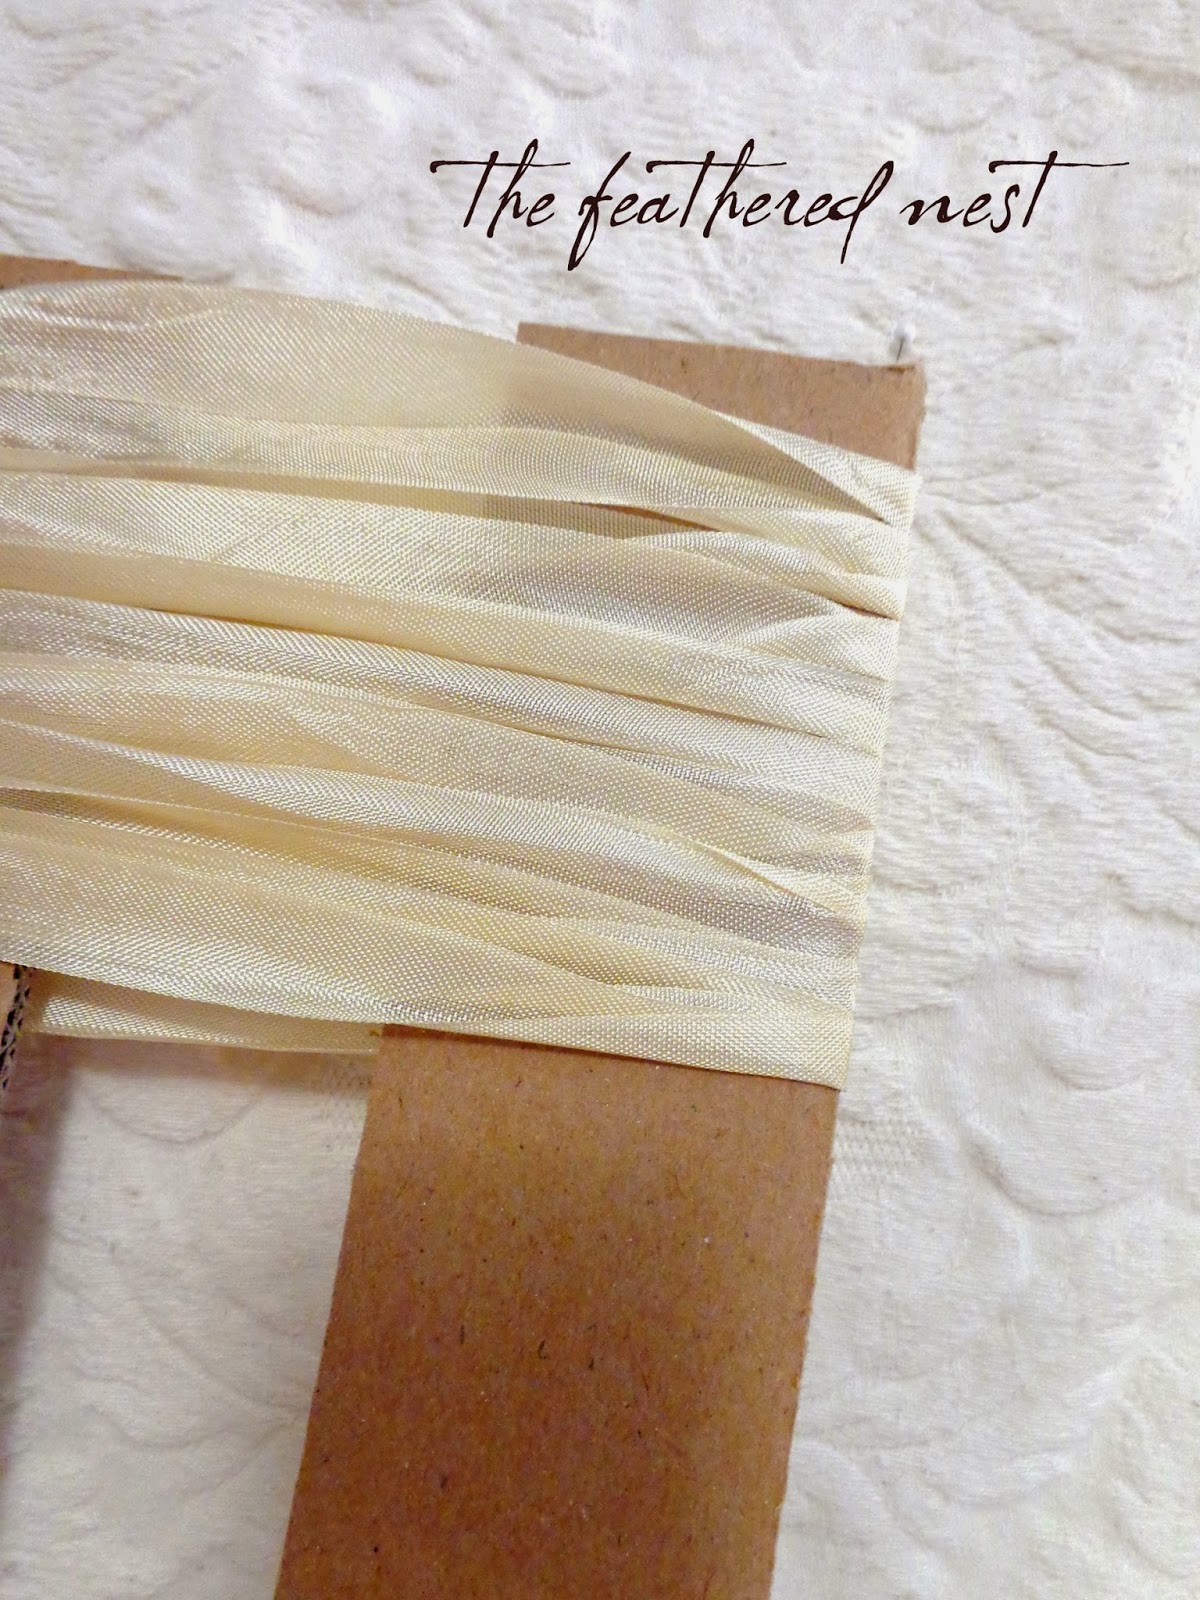
I made a makeshift spool holder with my pin cushion and a doll needle!!

3. Continue wrapping and twisting until you almost get to the bottom
of the opening in the center of your rectangle.
Cut the seam binding even with one side and pin it to the cardboard as well.
At this point you could also add a coordinating fiber or fuzzy yarn
and wrap it around on top of the seam binding to add
even more texture to your fringe. OR maybe add some delicate lace
wrapped around on top of the seam binding!
At this point you could also add a coordinating fiber or fuzzy yarn
and wrap it around on top of the seam binding to add
even more texture to your fringe. OR maybe add some delicate lace
wrapped around on top of the seam binding!

4. Put a zipper foot on your sewing machine and begin sewing down the middle
of your wrapped cardboard. I chose to sew close to the left side because I wanted
my doubled fringe to be staggered with one layer shorter that the other layer.

5. Carefully guide the sewing machine foot over the seam binding strips,
watching out for your fingers!
Remember to forward and reverse your stitching at the beginning
and end to lock in the threads so they won't come unraveled.

6. Here is how it should look when you are finished sewing through it all.

7. Now begin sliding your seam binding off of the cardboard rectangle.
This was a little tricky for me at first because I'd kind of wound mine tight
but eventually I shimmied it off.


8. Next, fold your seam binding strip in half on the stitch line. Use the warmth
of your fingers to finger press it down. Remember, mine isn't
exactly in half because I wanted the top layer to be shorter than the back layer.
Then using a warm iron (not too hot or it will melt the seam binding)
press the top layer down along stitching line.

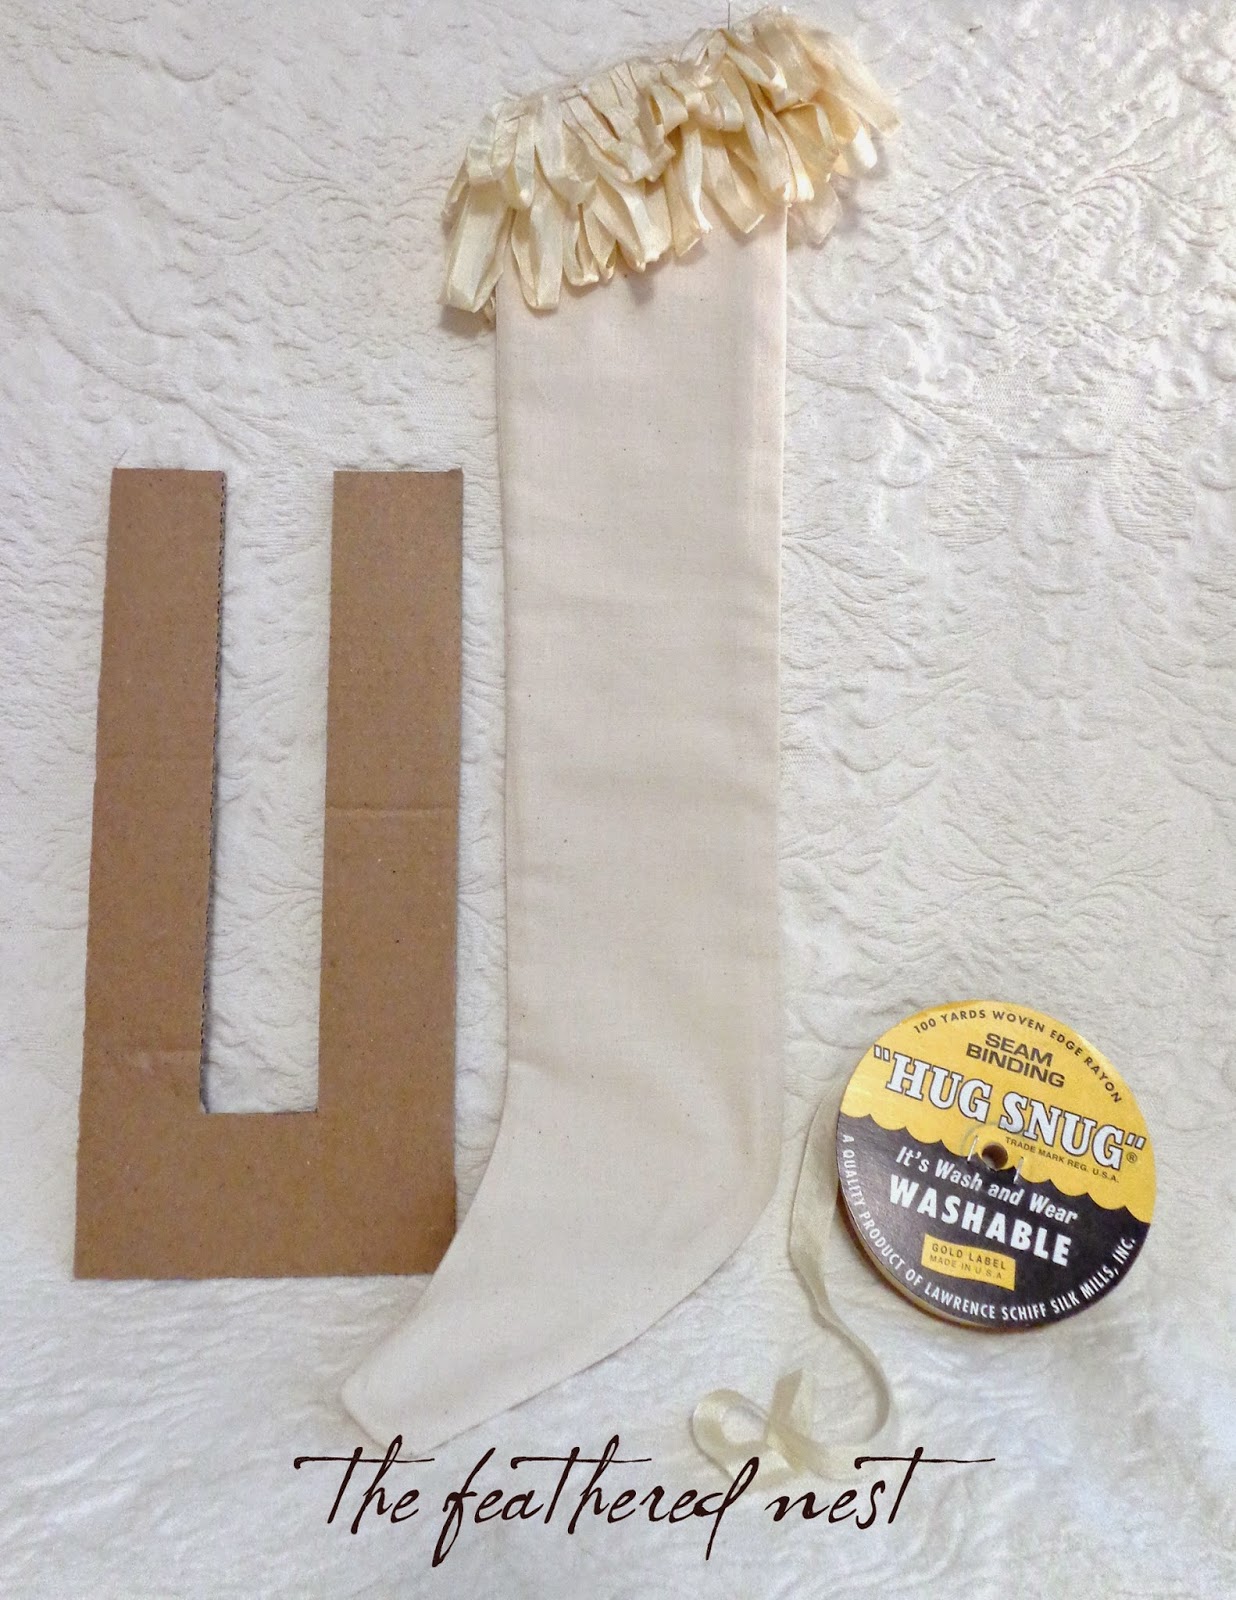
9. Attach to your project by sewing it on or even using Fabri-Tac glue and then trim off
any excess that you may have. If you sew it to your project, rather than
enclose it in the seam, you can sew a small strip of lace over your stitch line to hide it.
I have mine pinned to the top of the stocking I'm working on
for now because I want to play with some vintage lace layers and other elements.
So there you have it!!!
An easy way to create your very own seam binding to add to your purses,
collages, stockings, pillows or WHATEVER your heart desires.
♦ You could dampen your hands with water after applying to your project
and then scrunch it to give it wonderful old look!
♦ If you don't care for the loops, you can always cut through the
bottom of them to create a basic fringe.
♦ You could sew a line down the left side of the opening AND
down the right side of the opening and cut straight down the middle
and have DOUBLE the length too!
♦ If you don't care for the loops, you can always cut through the
bottom of them to create a basic fringe.
♦ You could sew a line down the left side of the opening AND
down the right side of the opening and cut straight down the middle
and have DOUBLE the length too!
♦ OH and remember, you can make your cardboard rectangle whatever
size you want...make it longer to create longer sections too!
The measurements of my fringe are 3 1/2" long for the back layer
and 2" long for the top layer.
If you need seam binding, be sure to visit Jeff at Zipperstop and
tell him The Feathered Nest sent you!!!
Don't you just love it when an idea WORKS????
The stocking is still in progress...so stay tuned :)
ps.....the color of the seam binding used in this project is Croquette Beige.
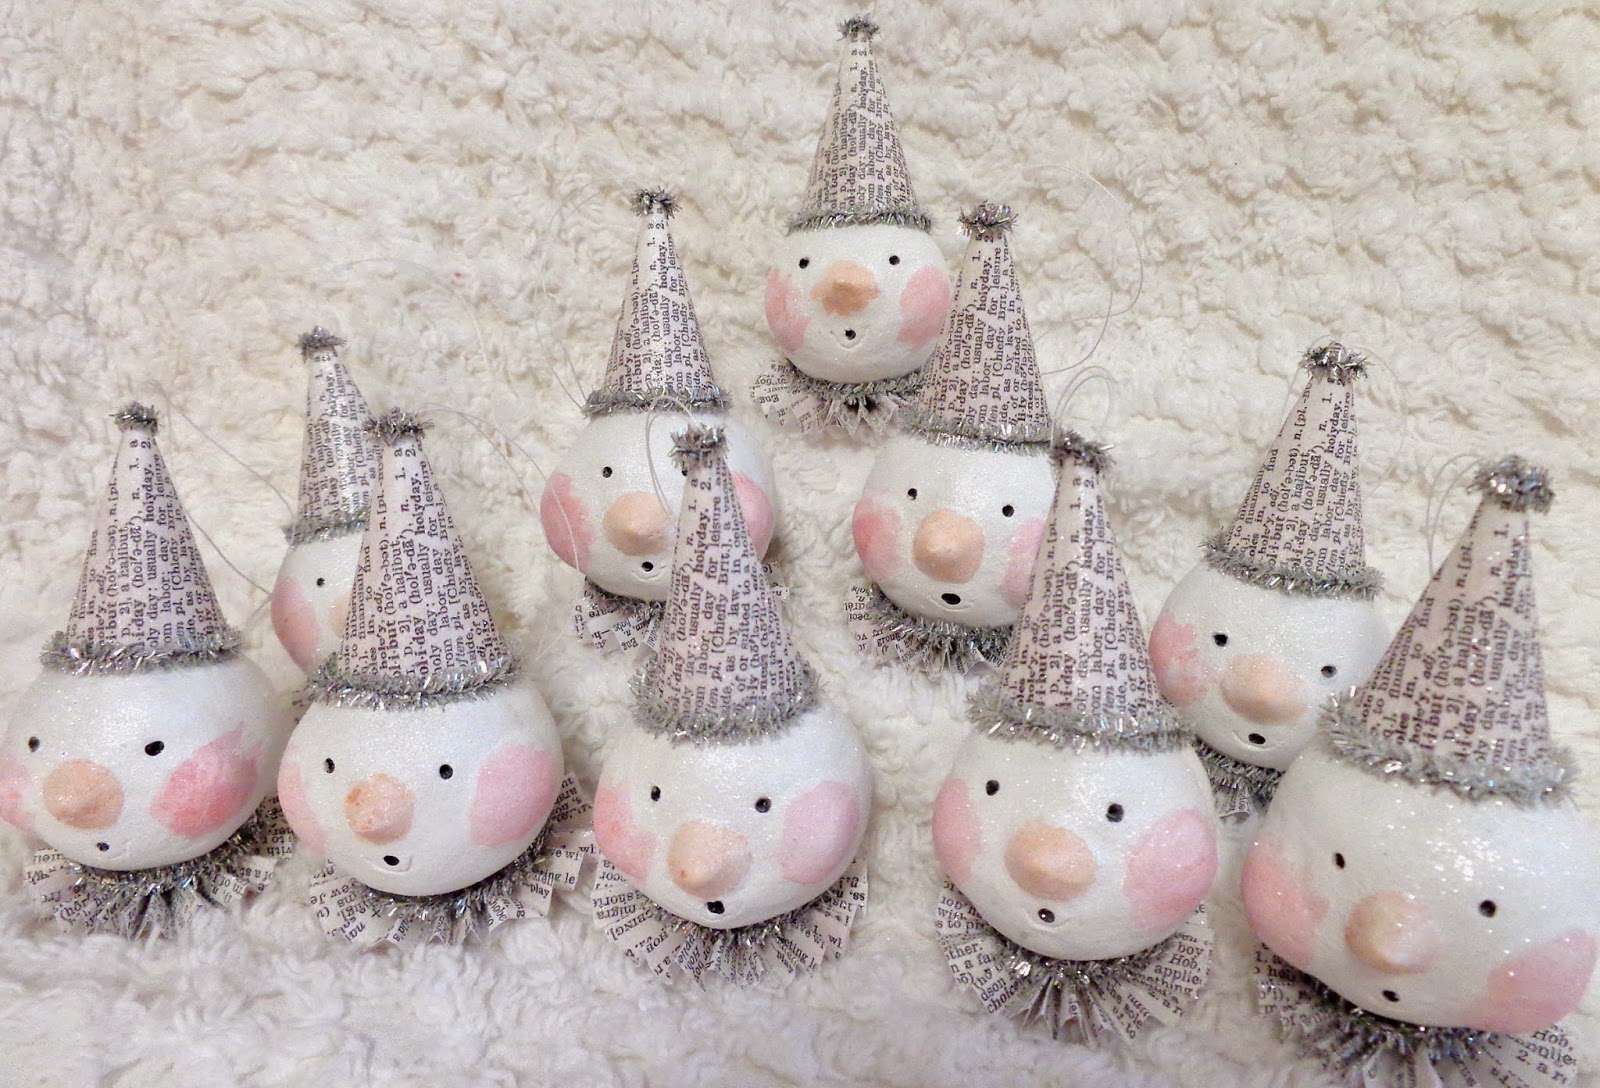
Here's glimpse at the little snowmen ornaments I made for a friend...
all finished and ready to go!!!

Wishing you a wonderful Wednesday dear friends,
hugs and love,
Dawn


.png)


.png)
15 comments:
Sweet Dawn,
thank you for that very neat tutorial!
I can't wait to see your finished stocking.
Many hugs,
Karen B. ~ Todolwen
wonderful! thanks Dawn. cannot wait to see stocking done too.
blessings
barb
Dawn
Love your tutorial! You continue to inspire with your wonderful creativity.
Debby
Debbygoesshabby.blogspot.com
What a great idea and thanks so much for the tutorial. Your little snowmen are just tooooo cute.
That is a wonderful idea my swet friend. How beautiful on your stocking, I just love what you figured out.
And so very sweet of you, to share your great tutorial, with us dearest Dawn.
You alwayes have such a loving heart !!
Hope your day will be filled with joy .
Love from Dorthe
Very pretty, Dawn! I think if I were going to do this I would need to buy it on the roll like you have it. I really like this as an option. I could see turning to this when nothing else is really "grabbing me". Thanks for sharing how to do it!
So clever you are!!! I love your idea. Thanks for sharing
OH, DAWN!! You share such clever ideas! I am so looking forward to the completion of your Christmas stocking. The looped seam binding is a delightful touch.
Sweet thoughts....Sandie
OHH..brilliant tutorial!! And your ornaments are the sweetest little things!! Thanks so much for sharing!
Hugs,T
That's awesome! Great idea with the cut in the cardboard for the sewing. Thank you for your tutorial and all the work you've put into it Dawn. Hugs
Thanks so much for sharing that with us! Always wondered how they made all that lovely trim. Now what needs trim-every thing!
Cannot wait to try this on a journal book I am making...and thank you for sharing your talent with us! Big hugs...
Jeannie
You are soo clever. The stocking looks beautiful already. Love your cute little snowmen too.
Hugs from here
Love the finished project on the cuff of that stocking Dawn!
Oh, you clever girl! I'd never have thought about cardboard. I used to have a do-hickey to crochet over that I thought would have worked,but I think I tossed it a LONG time ago. I have a TON of rayon tape... This will be in my to-do stuff, for sure.
Huggies!
S
Post a Comment