Showing posts with label tutorial. Show all posts

Tuesday, May 28, 2013

A free tutorial for you!
How to Create an Envelope Lavender Sachet ~


I've only made a few of these little goodies
but thought you would LOVE
making a some of these lavender sachets yourself!
I searched online for a pattern for a paper envelope
that I could add a bit of a seam allowance so I could
create a little envelope out of fabric!


Here's the pattern...and I've added a 1/4" seam allowance ~
The image below needs to fill an 8 1/2" x 11" piece of paper,
just so you know! Click it a few times to save it to your
computer so you will save it as large as I've given it.


Cut your pattern out and place it on two layers of canvas
or muslin or whatever fabric
to use for your envelope fabric!


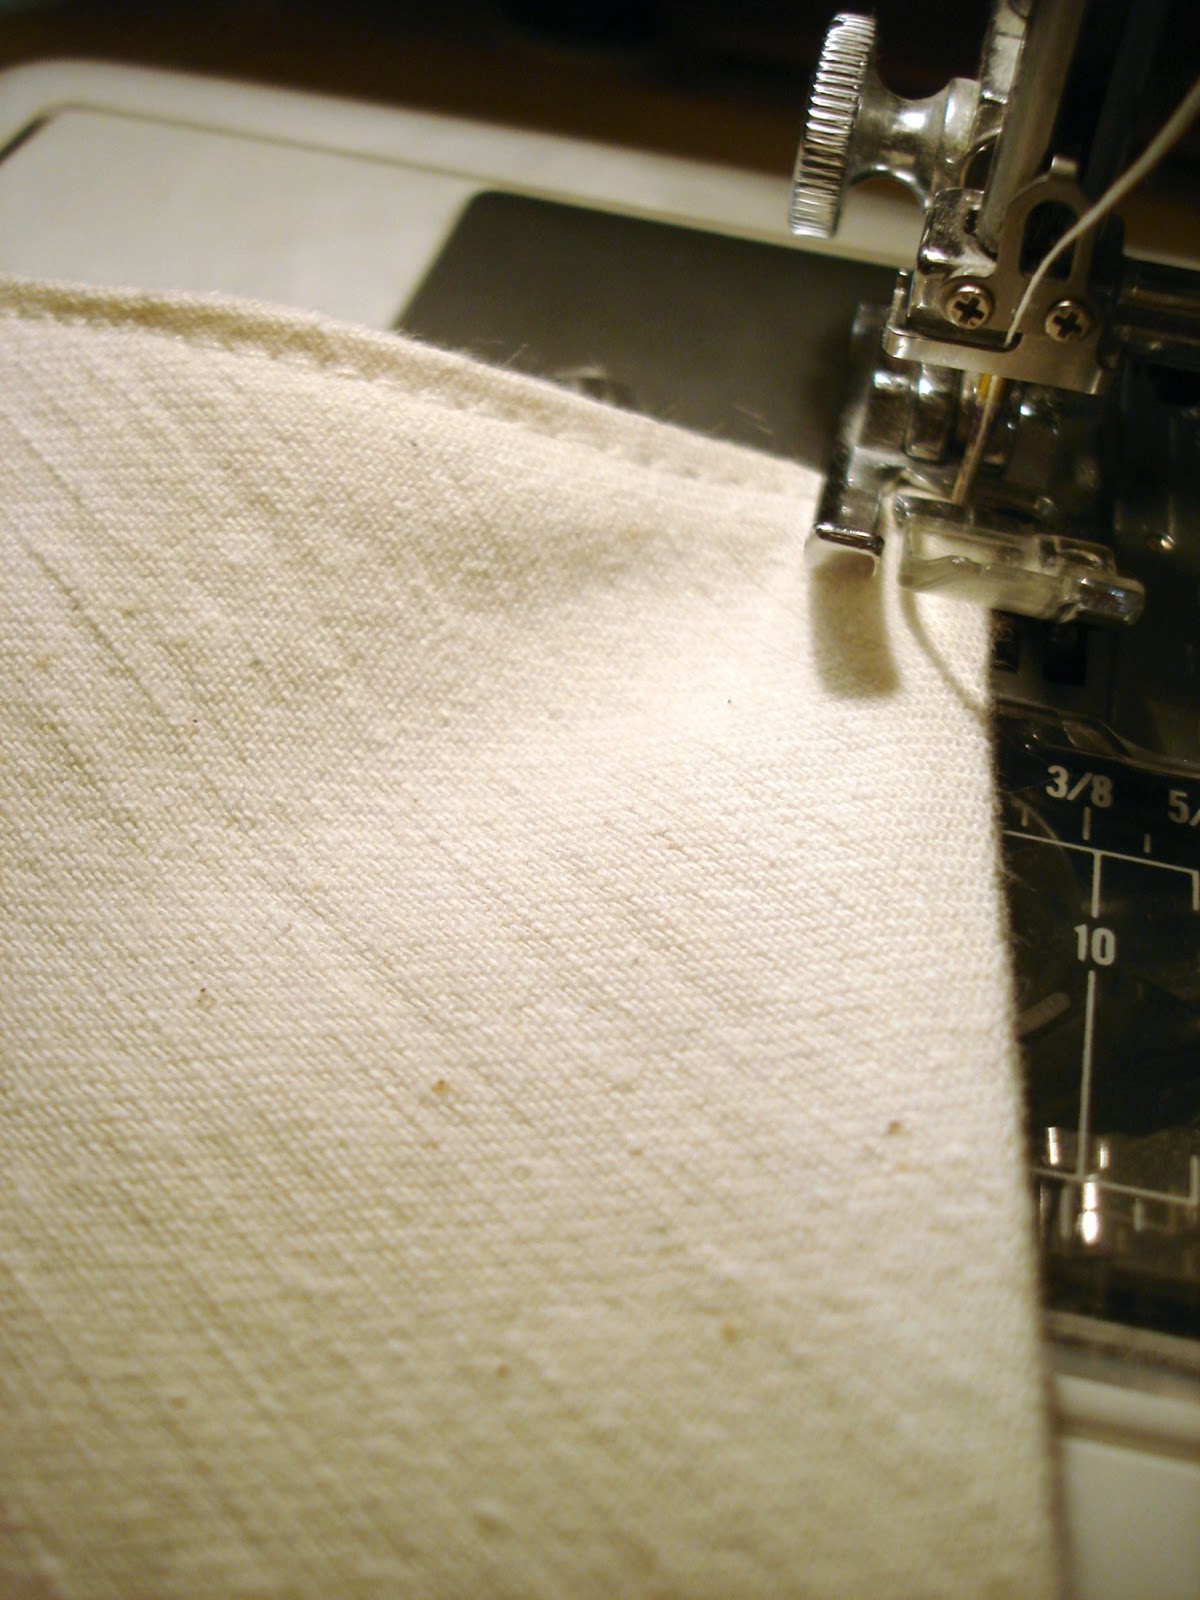
Be sure to leave an opening so you can turn the envelope right side out!


I sewed it up with a mere 1/4" seam allowance ~


Be sure to clip any corners off so when it's turned right side out,
you won't have any bulk to deal with ~


I tried to take a photo of me leaving the opening for turning...but you can
hardly see the stitching! But be sure to leave this opening ~


Yes, I had to share a pic of the turning process,
and YES it looks like a terrible blob!!


Be patient as you turn the envelope right side out,
It's looks junky and terrible at first ~


But, I always use an old chop stick as they are PERFECT
for helping turn things right side out and poking out corners and such!


As soon as you get all the corners poked out perfectly,
simply get your iron hot and press it all flat as a flitter!


When you have your envelope all pressed out,
take it back to the sewing machine and simply
sew a finishing stitch all around the edge...
a mere 1/8th of an inch from the edge
to finish off your envelope.


You should be able to fold it right into an envelope!
Press it when you do....


Now to measure for the simple muslin square pouch
that will hold the lavender buds inside.


Cut your tiny muslin square 4 3/4" x 3 3/4"....two thicknesses thick.... 


Sew three sides with a 1/4" inch seam allowance and turn the little square
right side out and press....now fill with wonderful lavender buds!!!
You can find these on ebay, don't buy the fancy blue ones,
these are fragrant, not so blue but perfect for sachets!


After filling your teeny pillow simply sew the end up...it doesn't even
matter if it's right side out at all because this sweet thing
will be sandwiched up inside the fabric envelope!


Now, just hand sew the two sides to one another...


Now, sew the bottom flap and the top flap together ~


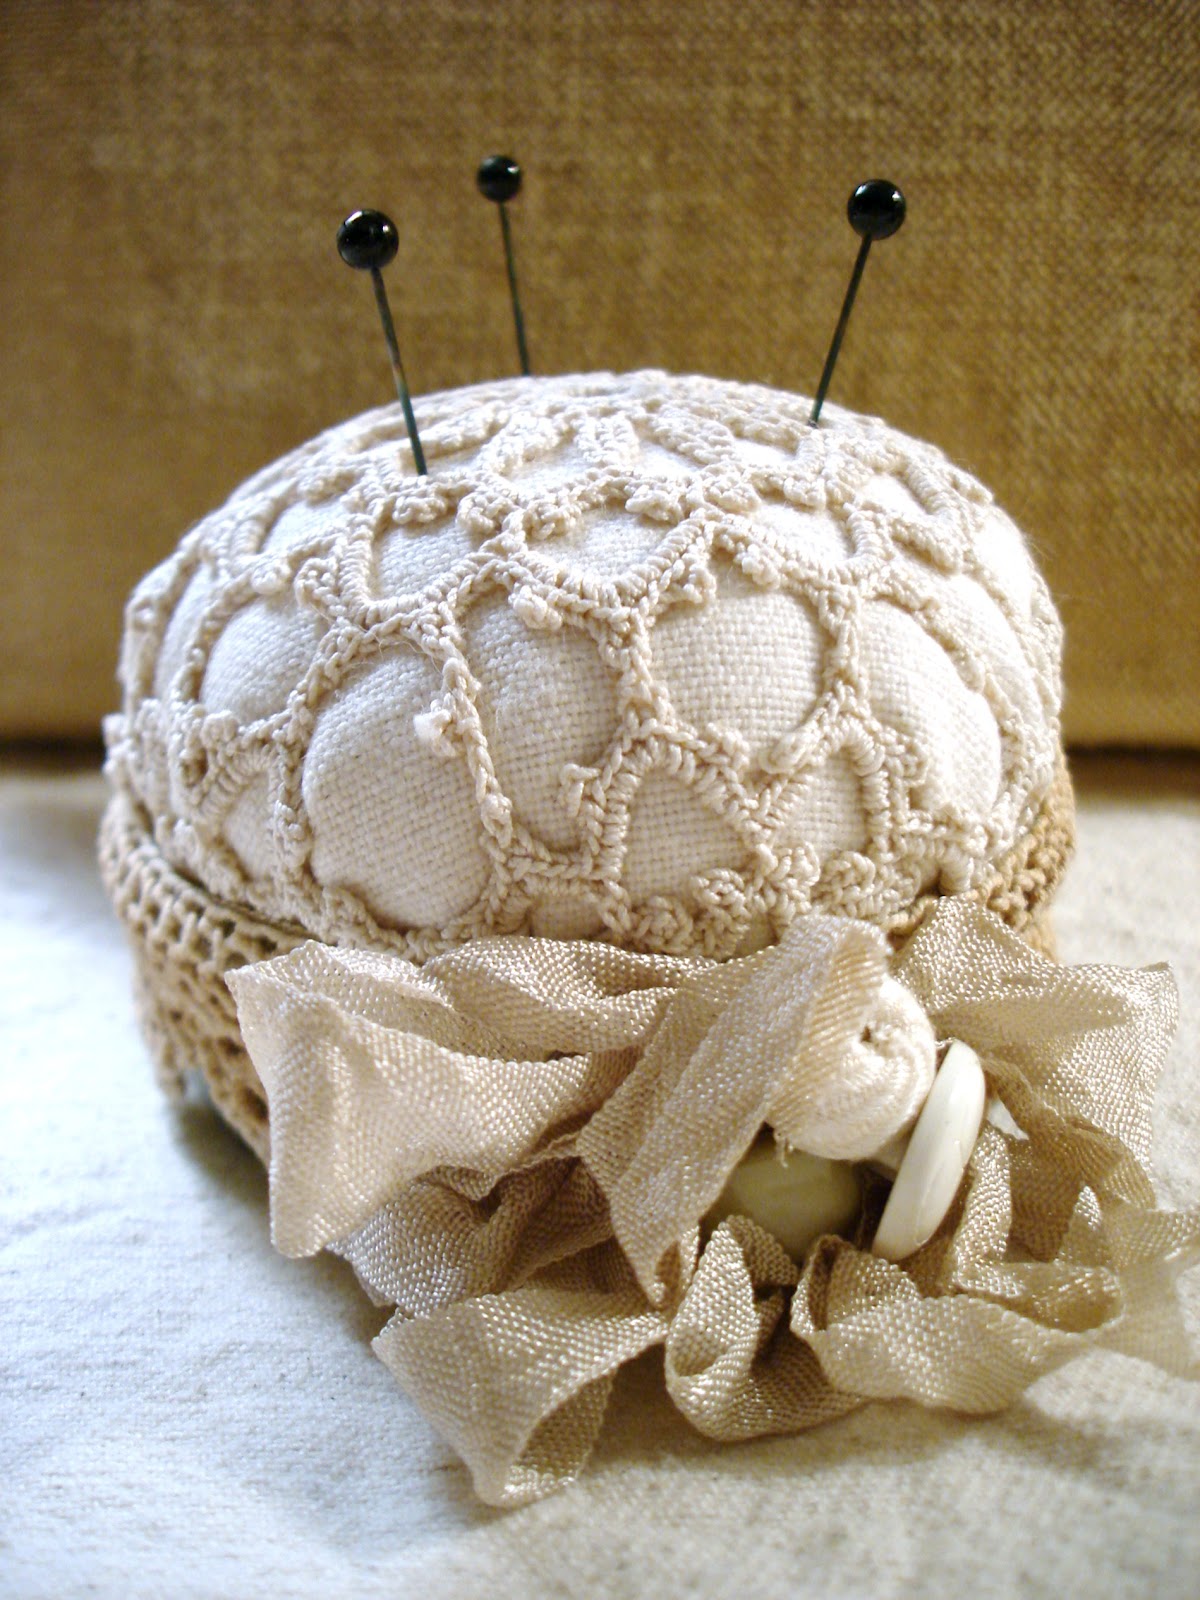
Add a gorgeous old button to the top flap,
sewing it in place.
Knotting it all underneath so
no one can see.


You can even add the face of a wonderful vintage watch!
Using a very skinny needle, sew it on, feeding the needle up
through the opening of the button and watch face,
then feeding the needle and thread through a very old
teeny, tiny pearl from an old necklace and then sew back down
through the watch face, button and knot it off.


Sew on a beautiful seam binding bow bundle....
And here's the little video I made about making those!
DON'T LAUGH, ok?


and guess what??
You are finished!!!


These would make the most wonderful gifts!!!
I so hope you loved the tutorial and that it's easy to understand ~

Wishing you a wonderful Tuesday my sweet, sweet friends,
hugs and love,
Dawn


Friday, February 17, 2012

Getting the mojo back with a teeny tutorial ~


Yesterday I woke up and headed straight to the studio....
mostly to work on a couple of orders I had.
I cleaned up a little
(that always gets me in a creative mood)
and ended up making something sweet
that I want to share with you :)


But, first I have to show you this gorgeous graphic from my sweet friend
Karen of The Graphics Fairy!
She featured this wonderful label today
and I just have to share it with you
because I know you'll love it....
visit her blog to download the largest size too!
PLUS she features it in reverse for transfers.


A few weeks back I found this sweet little package of sepia colored beads on clearance!
I loved the colors, loved the beads (great for custom pins you know)
and thought the packaging was so wonderful!


Well, after taking out the tiny bottles, I kept staring at the package.
It looked like a teeny, tiny theatre to me!


So, in my nutty, creative state I thought, what can I make of this????
I begin to deconstruct the package.
Gently slipping open the glued side
to see what it opens up to be.


Then I removed the clear acetate type window that was in the front.
Yes, I could have used it but I don't like the glare, you know?


Using my exact-o knife I also removed the tabbed part that they use to hang
this item in the craft stores.....


I tossed it into an old box and sprayed the front liberally with Elmer's spray adhesive....
Then pressed it down onto the BACK of some scrapbooking paper that I loved ~
remember it's face down onto the back.


THIS is the FRONT of the scrapbooking paper, pretty...don't you think?


Using my exact-o knife, I used the package as my guide and trimmed out each and every edge.


After I finished and flipped it over...a new, prettier package!!
I even used a make-up sponge lightly pressed in brown ink
to rub around the edges of the pretty opening.


I wanted to use older papers you know...maybe sheet music or dictionary pages,
but they don't have the strength that scrapbooking paper has.
ANYWAY....start folding the package back into it's creases...to form a box again!
You have to burnish well on each and every crease.


Can you see below the seam that was originally glued?
I'm not going to glue it back quite yet :)


After folding the little package all back together, what do you think?
HOW PRECIOUS IS THIS?
It really is so tiny, you know. It measures about 2 3/4" wide by about 2 1/2" tall ~
But don't you think it looks like a small theatre of sorts????


Now to decide what to place inside!
Hopefully now you will always look at packaging as....
A POSSIBILITY!


And I also finished my special orders!
Here they are...a few pincushions and a pin keep too ~


Creativity is always bubbling....just below the surface around here ~
who knows when it will show up!!!


Make something beautiful precious friends and thank you so much for visiting me!
Have a wonderful Friday,
hugs and love,
Dawn


Friday, February 19, 2010

Don't you just love a little "before" and "after"??

I'm trying my hardest to get my act together
and get the stuff loaded into the new space we've rented!!!
We've had this little table for awhile, and it's always needed some TLC....
so I put a coat of Kilz water based paint on...
and then another coat of satin latex paint on!
Don't you think it's such a sweetie now???
Oh my goodness...the magic of paint!!!


I've used this table as a sewing table back in the day...
but now it moves on,
maybe to a new home?


And a little more goodness to share with you ~

Blue Creek Home is having a beautiful giveaway HERE ~


Sweet Donna of Brynwood Needleworks is having a giveaway HERE ~


And Rebecca of A Gathering of Thoughts has shared a FREE
tutorial on how she makes her beautiful strawberry sachets HERE!!!!


Well, today I move the few little treasures
that we've gathered into our space.
We still have to find many more to fill it up
but I'll take some photos after I've
loaded what we have in ~ it seems you never have as much
as you'd like to have!!!!

Wishing you a most WONDERFUL Friday my sweet friends ~
hugs and love to you all,
Dawn

Labels

Related Posts Plugin for WordPress, Blogger...